Photo 12 (500) part 1
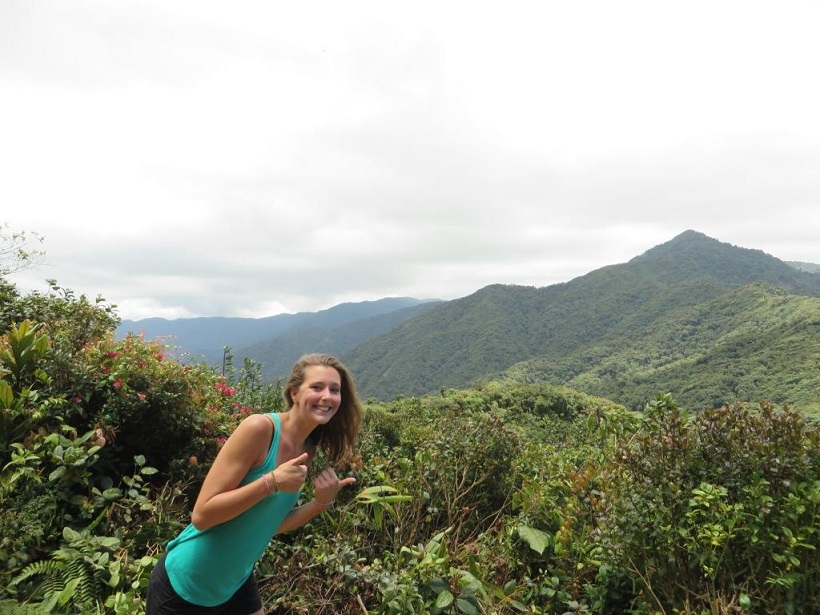
Photo 12 (500)
There is no cast shadow on the ground. In the case of photo 500 I will concentrate on the direction of sunlight.
I read a discussion about photo 500 (Lisanne at the Mirador) on the Cold Case blog [search for "An interesting discussion on Websleuths about the different clouds"].
I decided to illustrate the discussion with the real direction of sun rays.
How to interpret my combined photos placed below?
The photo combinations illustrate some possible directions of sunlight at the Mirador.
Each photo combination contains some symbols resembling the letter T indicating the direction of Lisanne or Kris's body.
1. mirador_noaa_13_00_directions1_combined.jpg
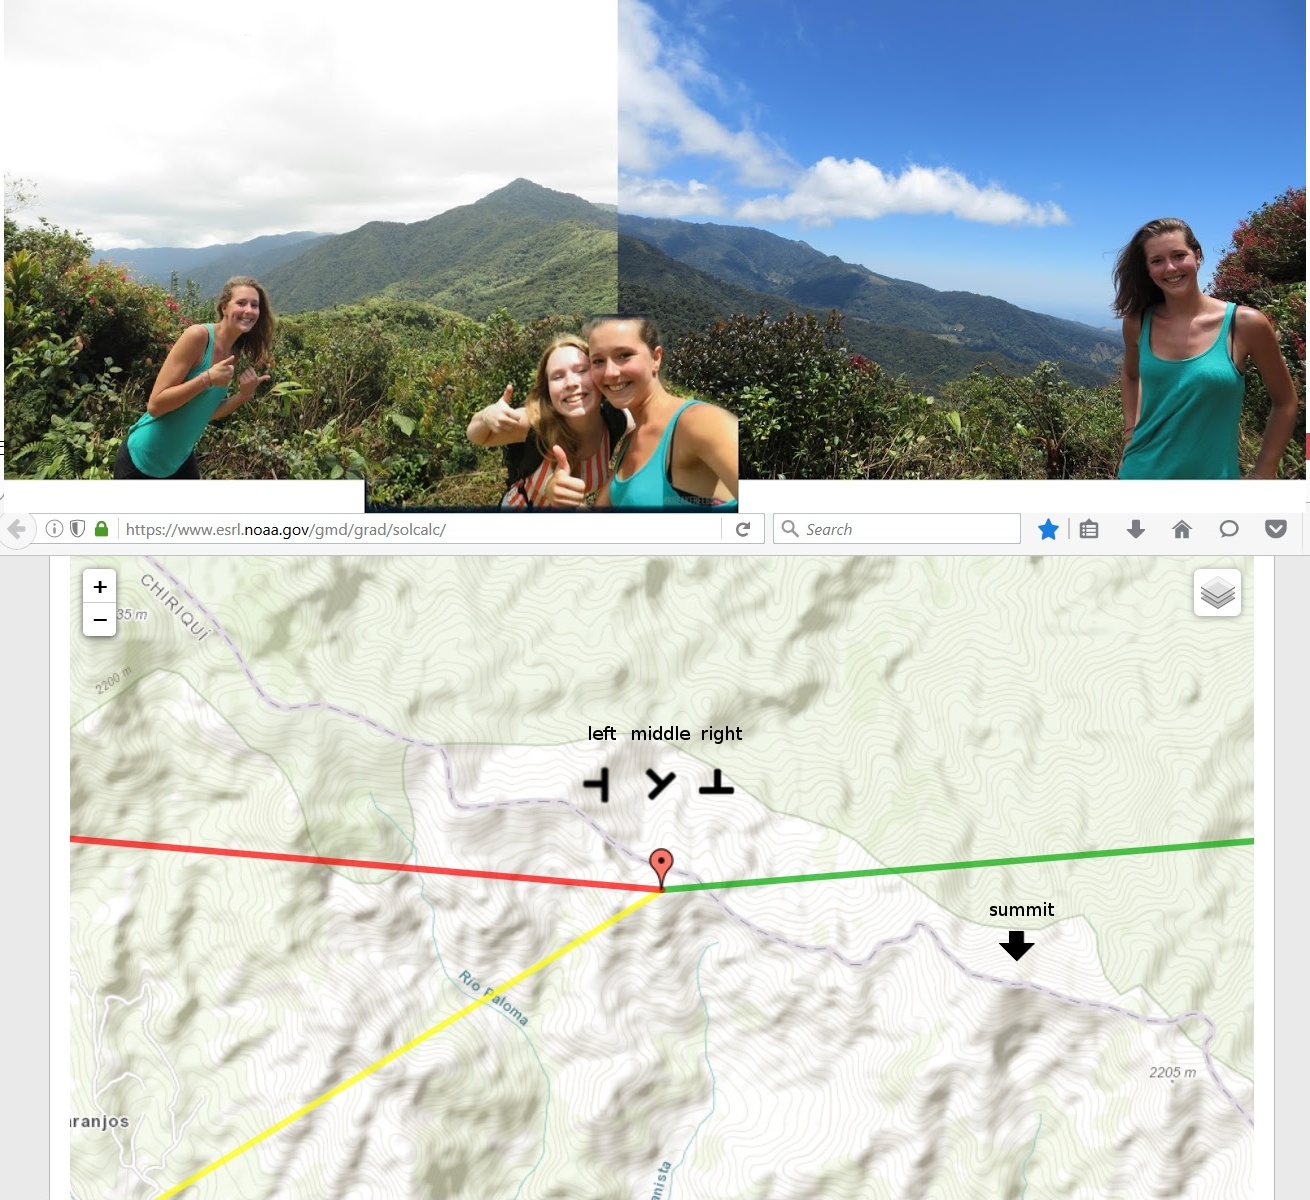
Photo 12-1
the left photo: a view to the east (Lisanne's back is turned to the east)
the middle photo: a view to the south-east (Kris's back is turned to the south-east; the rotated letter T indicates the position of Kris's body; Lisanne's back is turned to the south)
the right photo: a view to the south (Lisanne's back is turned to the south)
That is a start position of Lisanne's body in the left photo. I think we should turn it as below, because her body is turned relative to the view in the left photo.
2. mirador_noaa_13_00_directions2_combined.jpg
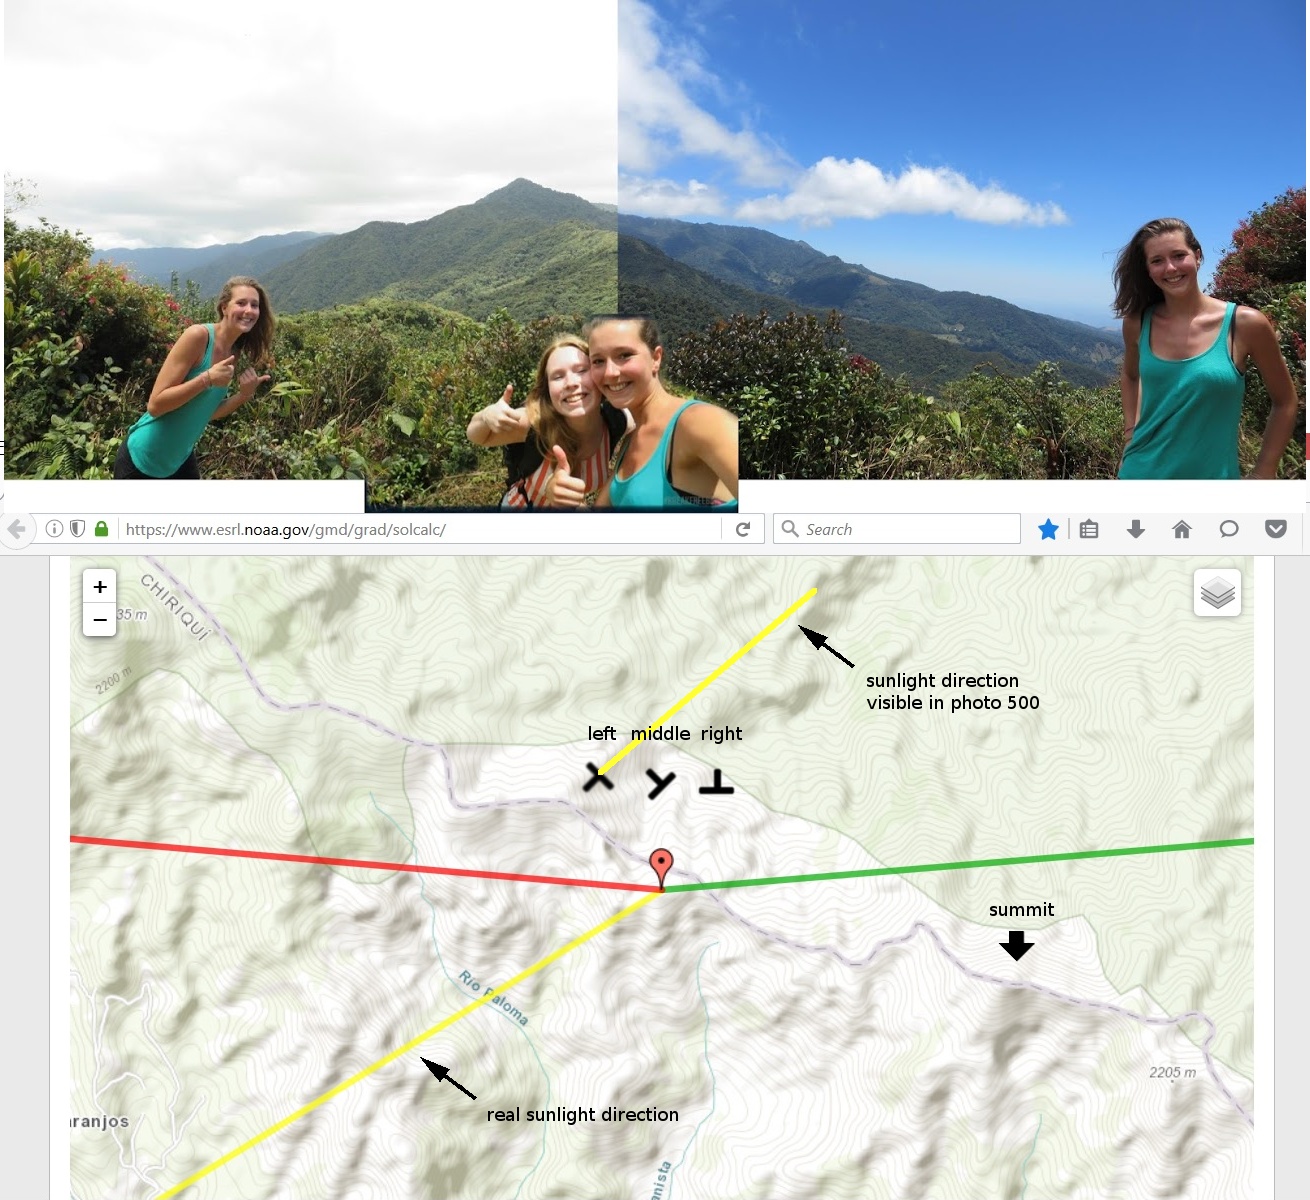
Photo 12-2
The same as point 1 above, but Lisanne's back is turned to the north-east. The symbol of Lisanne's body (the letter T) means that Lisanne's back is turned to the north-east, to be exact. I also added a yellow line indicating the sunlight direction visible in the left photo.
3. mirador_noaa_13_00_directions3_combined.jpg
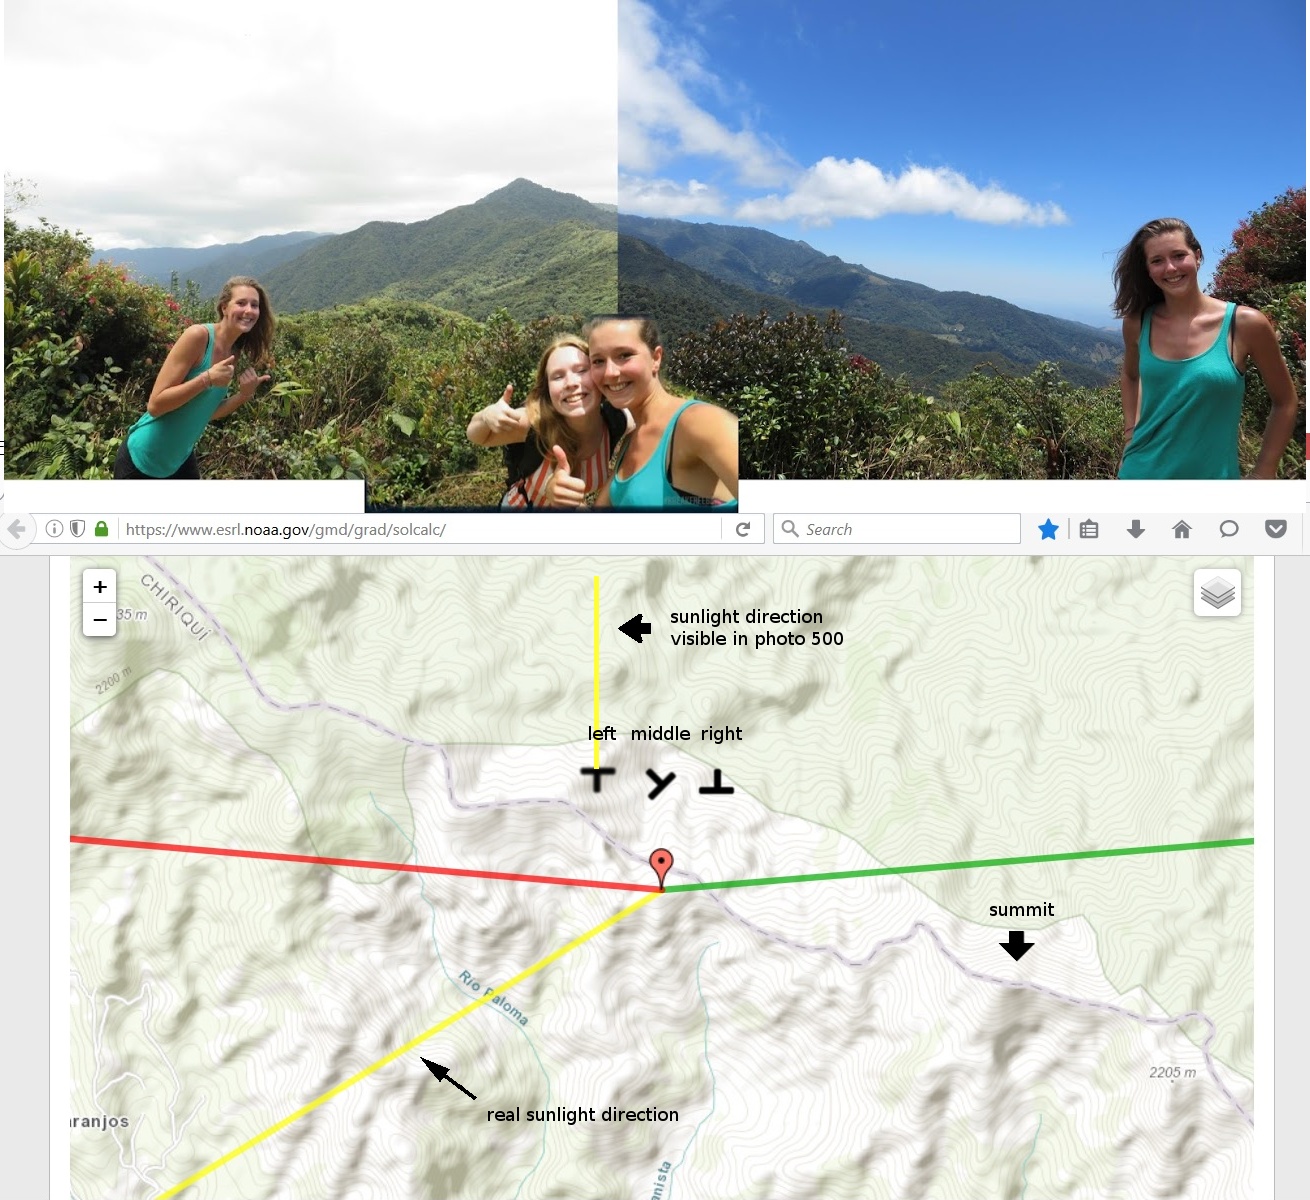
Photo 12-3
The same as point 1 above, but Lisanne's back is turned to the north. I also added a perpendicular yellow line indicating the sunlight direction visible in the left photo.
4. mirador_noaa_15_00_directions_combined.jpg
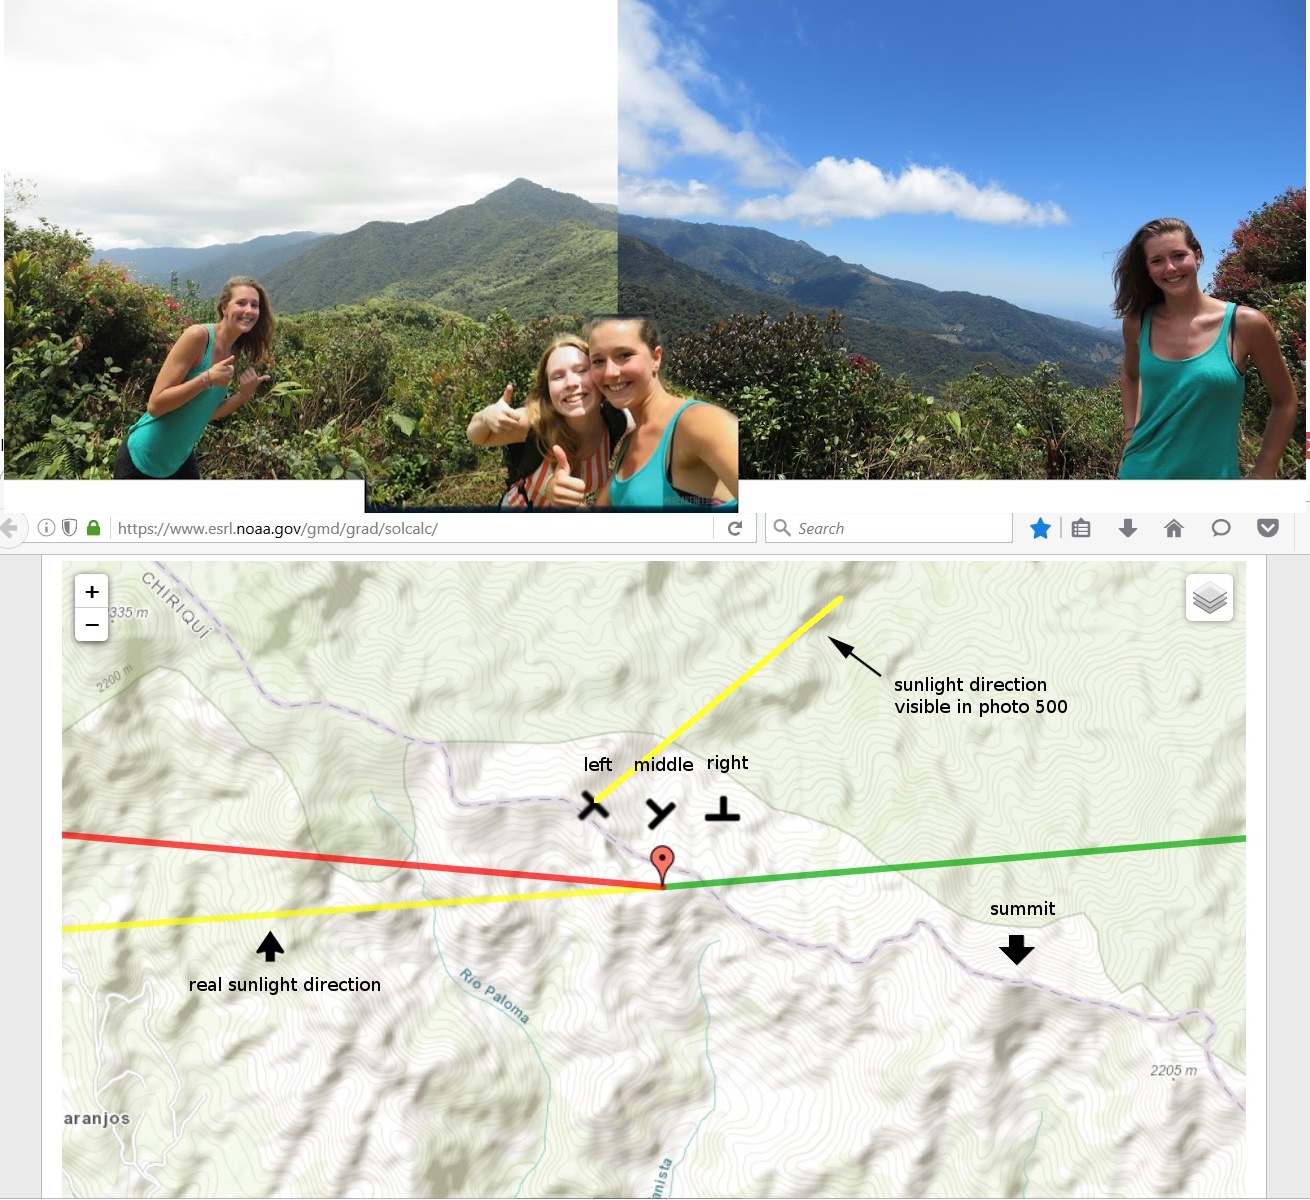
Photo 12-4
Lisanne's back is turned to the north-east. The direction of sunlight (the lower yellow line) is the same as at 15:00 on April 1st. The upper yellow line indicates the sunlight direction visible in the left photo.
In every combined photo:
the yellow line - the direction of sunlight at the given time (the time was set to 13:00 for photos in points 1-3, and to 15:00 for the photo in point 4)
the red line - the direction of sunlight at sunset
the green line - the direction of sunlight at sunrise
The central marked point of each map is the Mirador.
The arrow directed down points at the summit on the Continental Divide visible in the left photo. I assumed that it is the first summit above 2000m on the Continental Divide to the east of the Mirador. It is in the shape of a cone.
I took the following opinions into consideration:
Matteo replied to Lichtpuntje:
[...]
The difference in angle is some 80 degrees I guess, so that makes it [...]
My interpretation: The left photo (500) is a view rotated 80 degrees relative to the view in the right photo (499). For simplicity, I assumed that the difference in angle is 90 degrees.
Romijn replied
[...] one in the east direction, the other to the south and that [...]
My interpretation: The left photo (500) is in the east direction, the right photo (499) in the south direction.
There is also such an opinion on the Cold Case blog:
Danyo Romijn replied:
[...] On this picture the sun comes from up and a bit towards the photographer. The sun never
could come from the 'left' side, because there is the north and the sun never shines from the north. [...]
My opinion: The sun can shine from the north in Panama. There are actually a couple of months when the sun shines only from the north and it never shines from the south. That is the period from about 20th April to about 20th August. See the example in sun_path_mirador2014_06_01 (1).pdf. On this map, the sun path (the yellow arc) is above the marked point on the map (above the Mirador). That means that the sun never shines from the south on June 1st.
The photo mirador_noaa_2014_06_01_solar_noon.jpg is an example when the sun shone from the north at solar noon on June 1st 2014. The sunlight is straight from the north (the yellow line; the red line shows the direction of sunlight at sunset; the green line shows the direction of sunlight at sunrise).
The photo mirador_noaa_2014_06_17_11_25.jpg is an example when the sun shines from the north-east. The time was set to June 17th 2014 11:25:30.
The words "the sun comes from up and a bit towards the photographer" could be interpreted that the sun shines from the east. It isn't true at that time of the day. Any direction of sunlight from the east or from the north is incorrect at about 13:00 (or even at 15:00) that day. One may argue that Lisanne was turned further anticlockwise. I think the rotation 90 degrees anticlockwise relative to the view in the left photo is maximum acceptable rotation. Otherwise, we would see her back turned towards the photographer.
Another observation regarding directions of sunlight:
Lisanne's thumb of her right hand in the left photo seems to cast a shadow to the right, but Lisanne's thumb of her left hand in the middle photo casts a shadow definitely to the left. That's almost in the opposite direction.
Looking at the attached photos we may conclude that it was impossible on April 1st 2014 that the sun shone in the direction that we see in the left photo. Something is wrong with the direction of the sunlight in the left photo. The difference between directions is significant.
It needs to be examined by taking a test photo when the sun shines in the same direction as on April 1st 2014 at 13:00.
Some information which we should know before taking a test photo:
The position of the sun on April 1st 2014 at 13:01:44 (the time of taking photo 500 according to exif data):
azimuth=240.03 elevation=81.87
More about sun elevation and azimuth in SolarGeo.pdf, page 9.
We should take a test photo on a sunny day when the azimuth is the same.
Examples:
10.09.2019 12:54:06 azimuth=240.03 elevation=82.12
1.10.2019 13:40:52 azimuth=240.03 elevation=66.35
20.10.2019 14:25:10 azimuth=240.03 elevation=52.21
20.03.2020 13:34:58 azimuth=240.03 elevation=73.19
29.03.2020 13:08:50 azimuth=240.03 elevation=80.02
1.04.2020 13:00:11 azimuth=240.04 elevation=82.28
During the period from September 10th to April 1st the sun shines from the south-west (azimuth=240.03) at some time after midday.
How to prepare to take a test photo to examine directions of sunlight at the Mirardor?
From a weather report we know that tomorrow (for example tomorrow is March 29th 2020) is a sunny day at the Mirador. We know that the sun will shine from the south that day.
1. Check the table of sun's azimuths on the www.sunearthtools.com website.
Go to https://www.sunearthtools.com/dp/tools/pos_sun.php?lang=en.
Set the coordinates of the Mirador:
Put 8.834527, -82.424745 in the search field (latitude and longitude). Press the "search" button.
Set the time zone to -5.
Leave the DST field unchecked. DST means Daylight Saving Time (summer time).
There is no DST in Panama.
Set the date to March 29th 2020.
Press the "execute" button.
There is a table of sun's positions below the map. Set the step to 5 minutes and press the "execute" button near the step field.
Example for 29.03.2020:
13:05:00 azimuth=236.92 elevation=80.84
13:10:00 azimuth=240.86 elevation=79.78
Now we know that we need to be at the Mirador at about 13:05.
2. If you want to know the exact time when the sun's azimuth will be exactly 240.03, go to https://www.esrl.noaa.gov/gmd/grad/solcalc/.
Set coordinates of the Mirador: latitude=8.834527, longitude=-82.424745. Set the time zone, date as in point 1. Find the proper time after 13:05 when azimuth is 240:03. Actually, it is at 13:08:50. So if we want to be precise, we may take a test photo at 13:08:50. This point is optional. We don't know the exact time when photo 500 (Lisanne at the Mirador) was taken. We only know the official time from the investigation. It is 13:01:44 (the corrected time from exif data). I think the information in point 1 will be sufficient.
3. Before hiking the El Pianista trail synchronize the time in your camera to the local time in Panama.
4. Two persons will be needed in such an experiment. One for taking a photo, the other will be posing for a photo.
5. Go to the Mirador. Between 13:05 and 13:10 take a photo of your companion with the view of the Continental Divide just as in photo 500 (Lisanne at the Mirador, the left photo in the attached combination). Take another photo of your companion with the view as in photo 499 (another photo of Lisanne at the Mirador, the right photo in the attached combination).
The best day to take such a test photo would be April 1st, but the weather may not be sunny.
The best period will be some days before April 1st or two days after April 1st. Later the sun shines from the north more often and I'm not sure about the directions.
The period around September 10th is good too.
How did I make such photo combinations?
The top part is a photo downloaded from this photo collection.
The bottom part is a screen cast made from the NOAA Solar Calculator website
https://www.esrl.noaa.gov/gmd/grad/solcalc/
How to obtain such a map?
1. Go to https://www.esrl.noaa.gov/gmd/grad/solcalc/
2. Set the coordinates of the Mirador:
latitude=8.834527, longitude=-82.424745 (longitude is negative in Panama)
Set the Time Zone to -5.
Leave the DST field unchecked. DST means Daylight Saving Time (summer time).
There is no DST in Panama.
Set the date to April 1st 2014.
Set the time to 13:00:00.
Remember that every time you change the data (hours, minutes, seconds for example) you should click another field on the website so that the changed data will be reflected in results.
Select show sunrise, show sunset, show azimuth.
Magnify the map.
Select 'Topographic' in the menu in the top right corner of the map.
3. Make a screen cast and save it as a jpg file on your disk.
A supplementary method to taking a test photo is to measure the azimuths of the directions with a compass. Here is a photo whose purpose is to make it easy to measure azimuths mirador_directions.jpg.
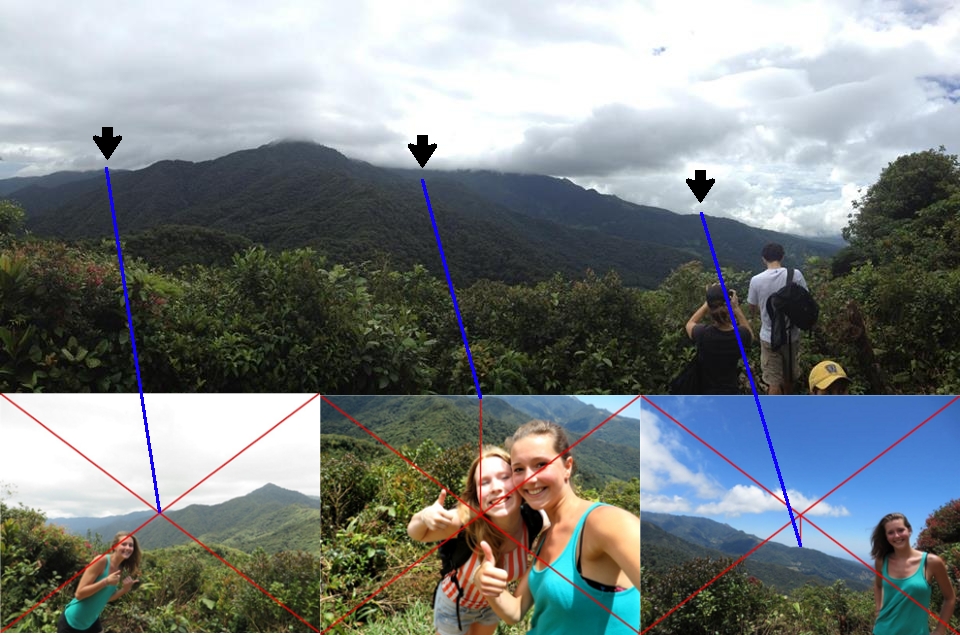
Photo 12-5
In the three photos placed in the analysed combination two diagonal lines were drawn. The point where the lines cross determines the center of every photo. Then a perpendicular line was drawn from the center to a point on a mountain ridge in every photo if the center is not on a mountain ridge. These points determine the azimuths that must be measured with a compass. Then the blue lines were drawn to illustrate the position of those points in the upper panorama photo.
Here is a website where you can find more information about measuring horizontal angles http://www.fao.org/tempref/FI/CDrom/FAO_Training/FAO_Training/General/x6707e/x6707e03.htm.
Remember that if you use a magnetic compass, the measurements must be compensated for by the magnetic declination. More about adjusting a compass for magnetic declination here https://www.princeton.edu/~oa/manual/mapcompass2.shtml.
You can find the website showing historical magnetic declination on the globe here https://maps.ngdc.noaa.gov/viewers/historical_declination/.
You can use the following website to determine magnetic declination https://www.ngdc.noaa.gov/geomag/calculators/magcalc.shtml.
The magnetic declination for the Mirador (latitude = 8.834527 N, longitude = 82.424745 W):
2019-10-08 2.83 degrees West
The above value must be subtracted from the value measured with a magnetic compass. It is westerly magnetic declination.
If you use a GPS compass (for example, a program on your mobile phone), such compensation is not needed.